Coppelia simulator basics
This tutorial will explore coppelia sim and understand basic interactions using the ZeroMQ remote API
The tutorial was made on ubuntu 20.04
After studyuing this tutorial you will understand how to:
- install Coppelia Simulator
- add and manipulate basic shapes
- add and manipulate joints
- setup ZeroMQ remote api
-
interact with the simulator and simulation using the ZeroMQ API
Note : The tutorial assumes you have a folder named
coppeliain your home directory, so you should create it first$ mkdir ~/coppelia
Installing the simulator
-
Visit the coppelia simulator website and go to downloads section. https://www.coppeliarobotics.com/downloads
- Download the edu version (since we are not using it for commercial purposes)
-
Extract the downloaded folder and copy to desired location
I am going to assume that we have renamed the extracted folder to
CoppeliaSimand placed it at/home/<user>/coppelia/CoppeliaSim -
Test the installation by going to
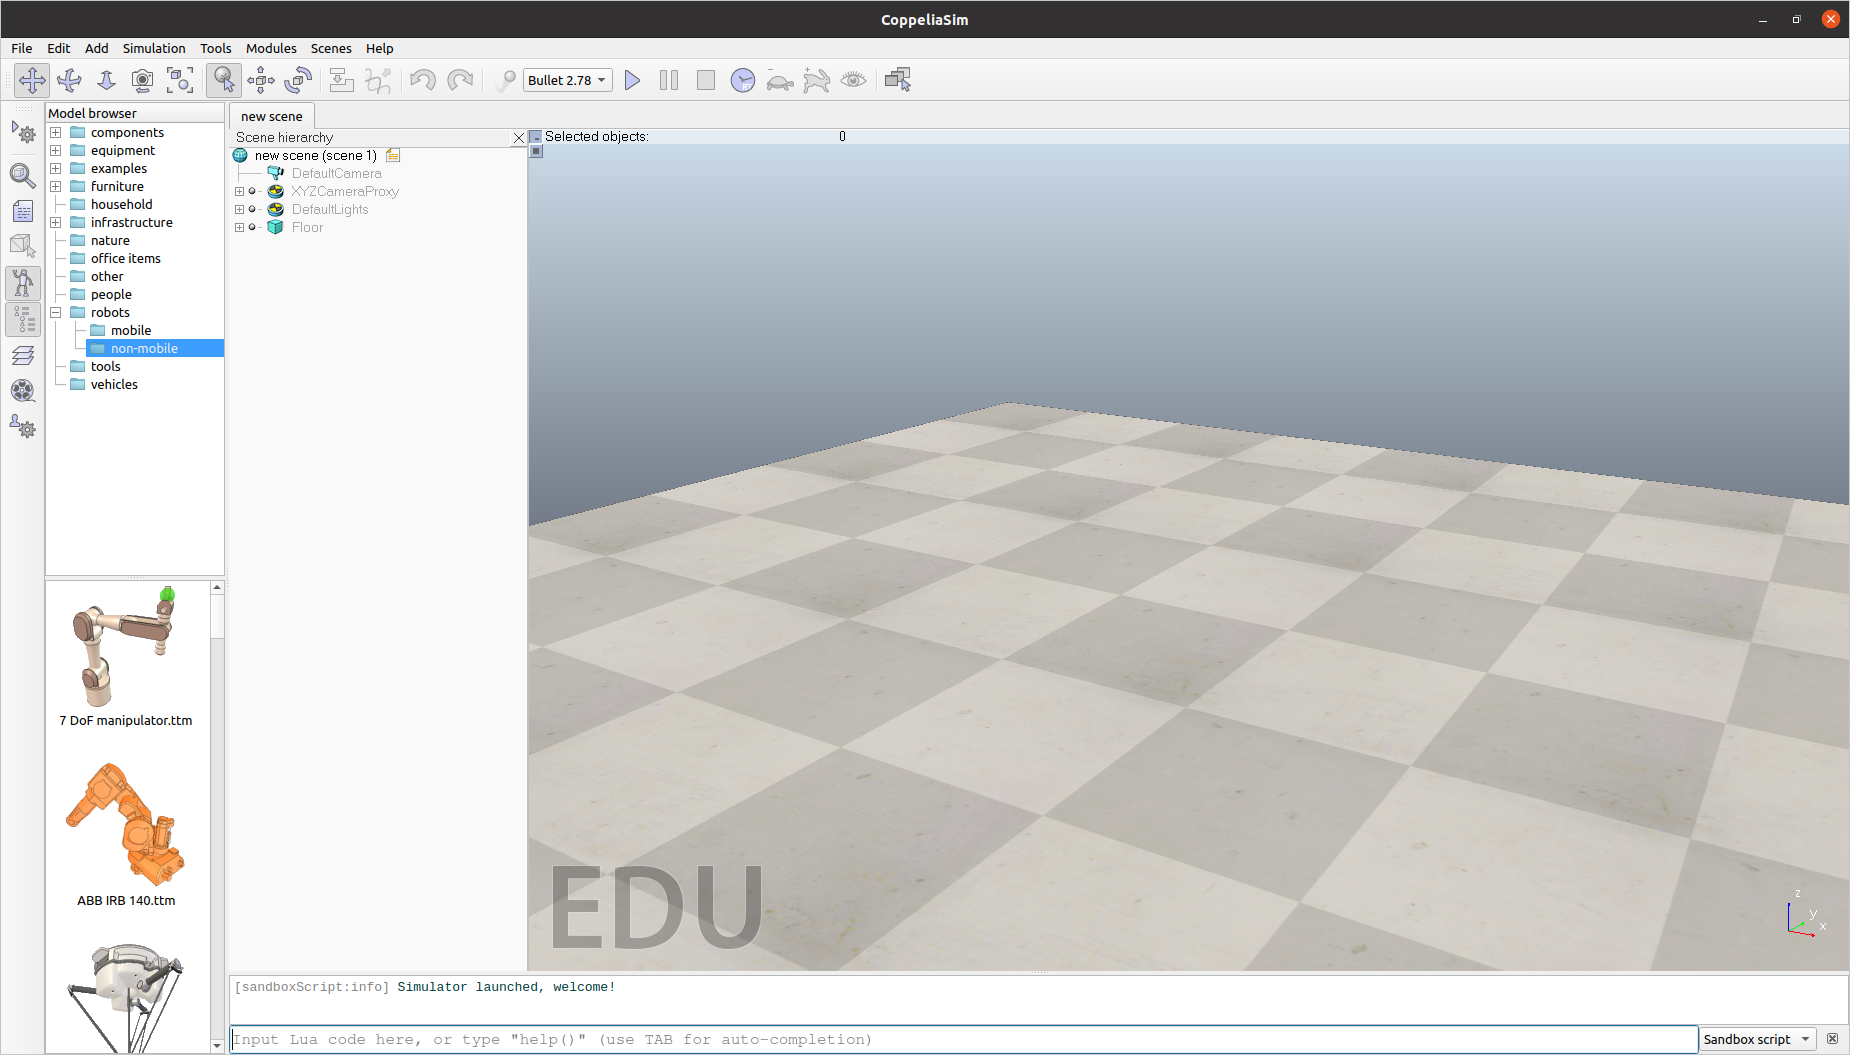
/home/<user>/coppelia/CoppeliaSimand running ./coppeliaSimOnce the simulator starts up, you should see the following screen.
The version of the simulator used here is
4.4.0 rev 0, if you are using another version , there could be slight differences. - If you saw the screen, coppelia simualtor has successfully been installed on your system.
Creating a simple robot
Before proceeding further, you should familiarize with the interface of the simuator so that you know what the terms being talked about are referring to.
you can find the refrence in the User Interface section of https://www.coppeliarobotics.com/helpFiles/index.html
Now that the simulator is ready for use, we will create our own simple robot arm to explore and understand how robot/models are represented in CoppeliaSim.
Our robot is going to be a 1 DOF robot arm. It is going to consist of :
- A tall cuboidal base
- One cylindrical link attached to the base by a revolute joint.
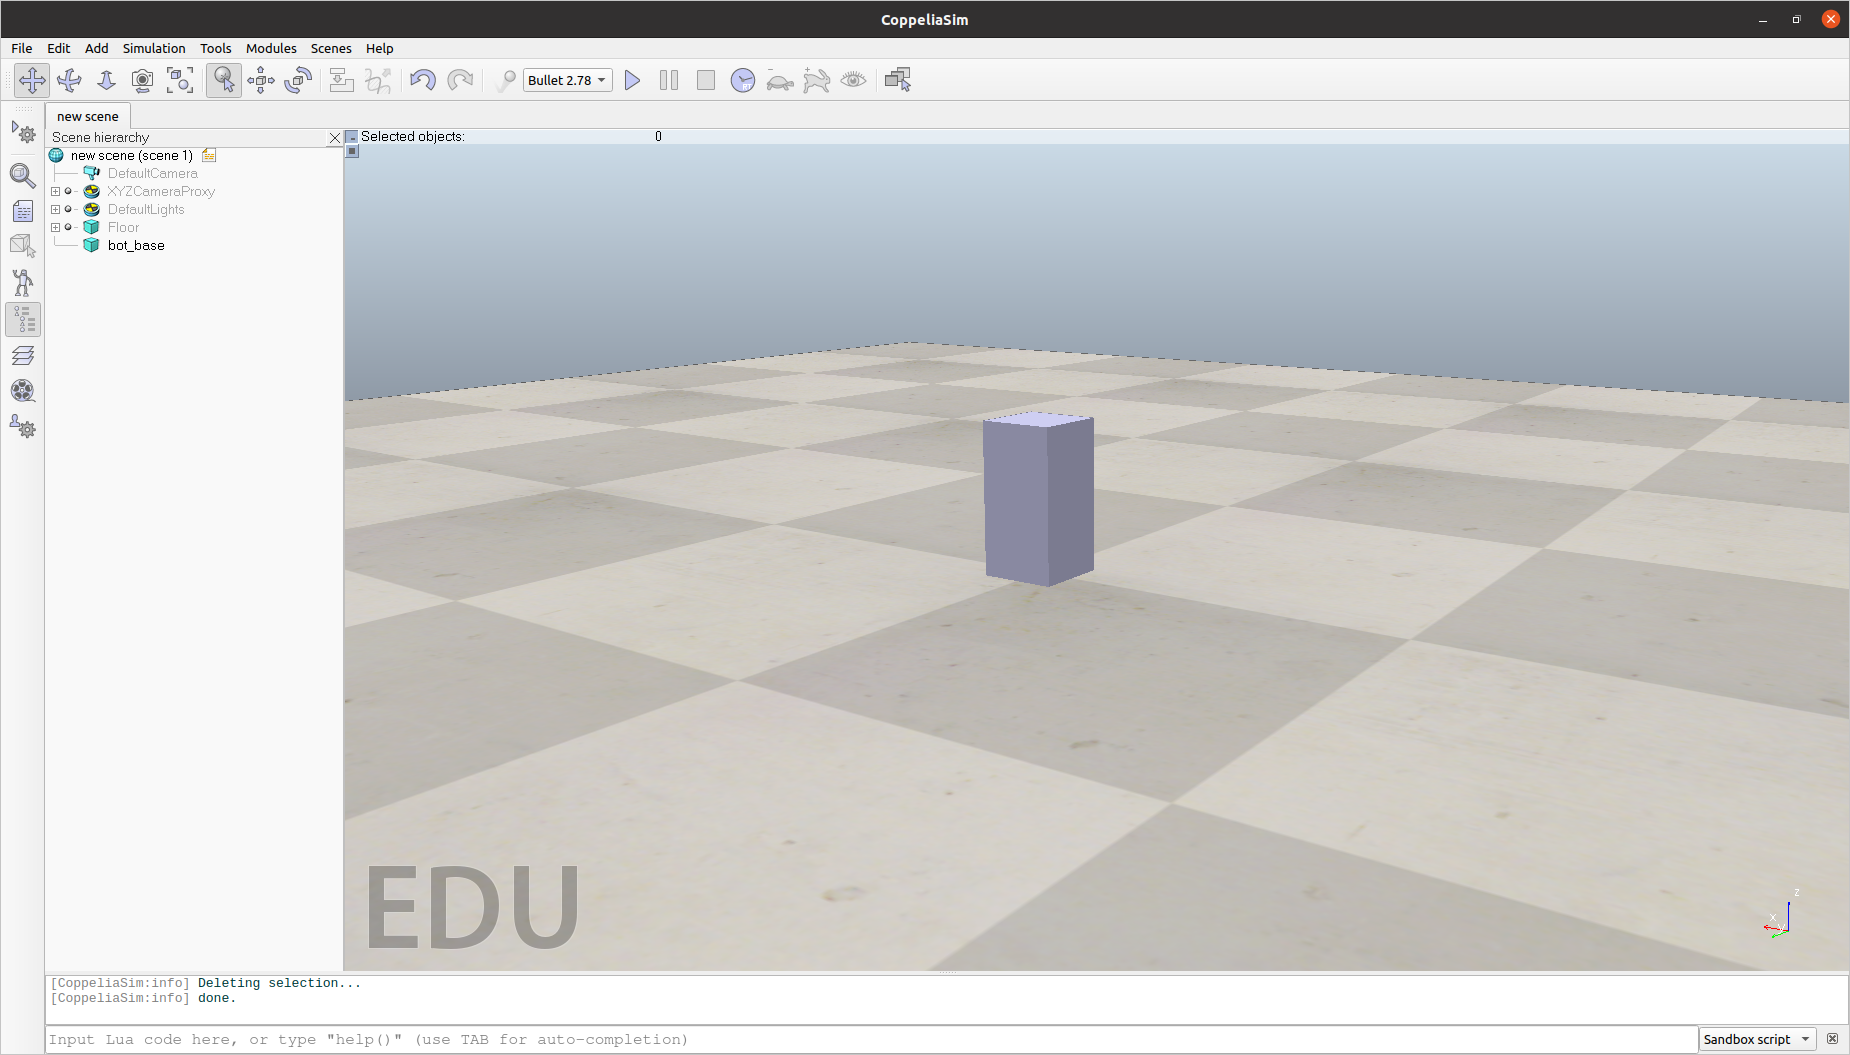
- Go to Menu –> Add –> Primitive Shape –> Cubiod, set dimensions x = 0.1, y = 0.1 and z = 0.2, rename the shape to ‘robot_base’. you should see an object like this
-
Next , we will add a revolute joint. Go to Menu –> Add –> Joint –> Revolute and rename it to
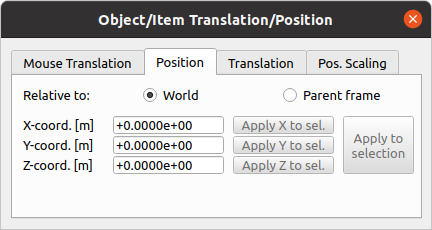
shoulder_joint. This will create a joint at the origin, to place the joint at our desired position (i.e top of the cuboid) we need to apply translation to the joint.- Select the joint from scene hierarchy
- click on the translation button

- A pop up window will appear, select the position tab and you should see options like this.
-
Keep the
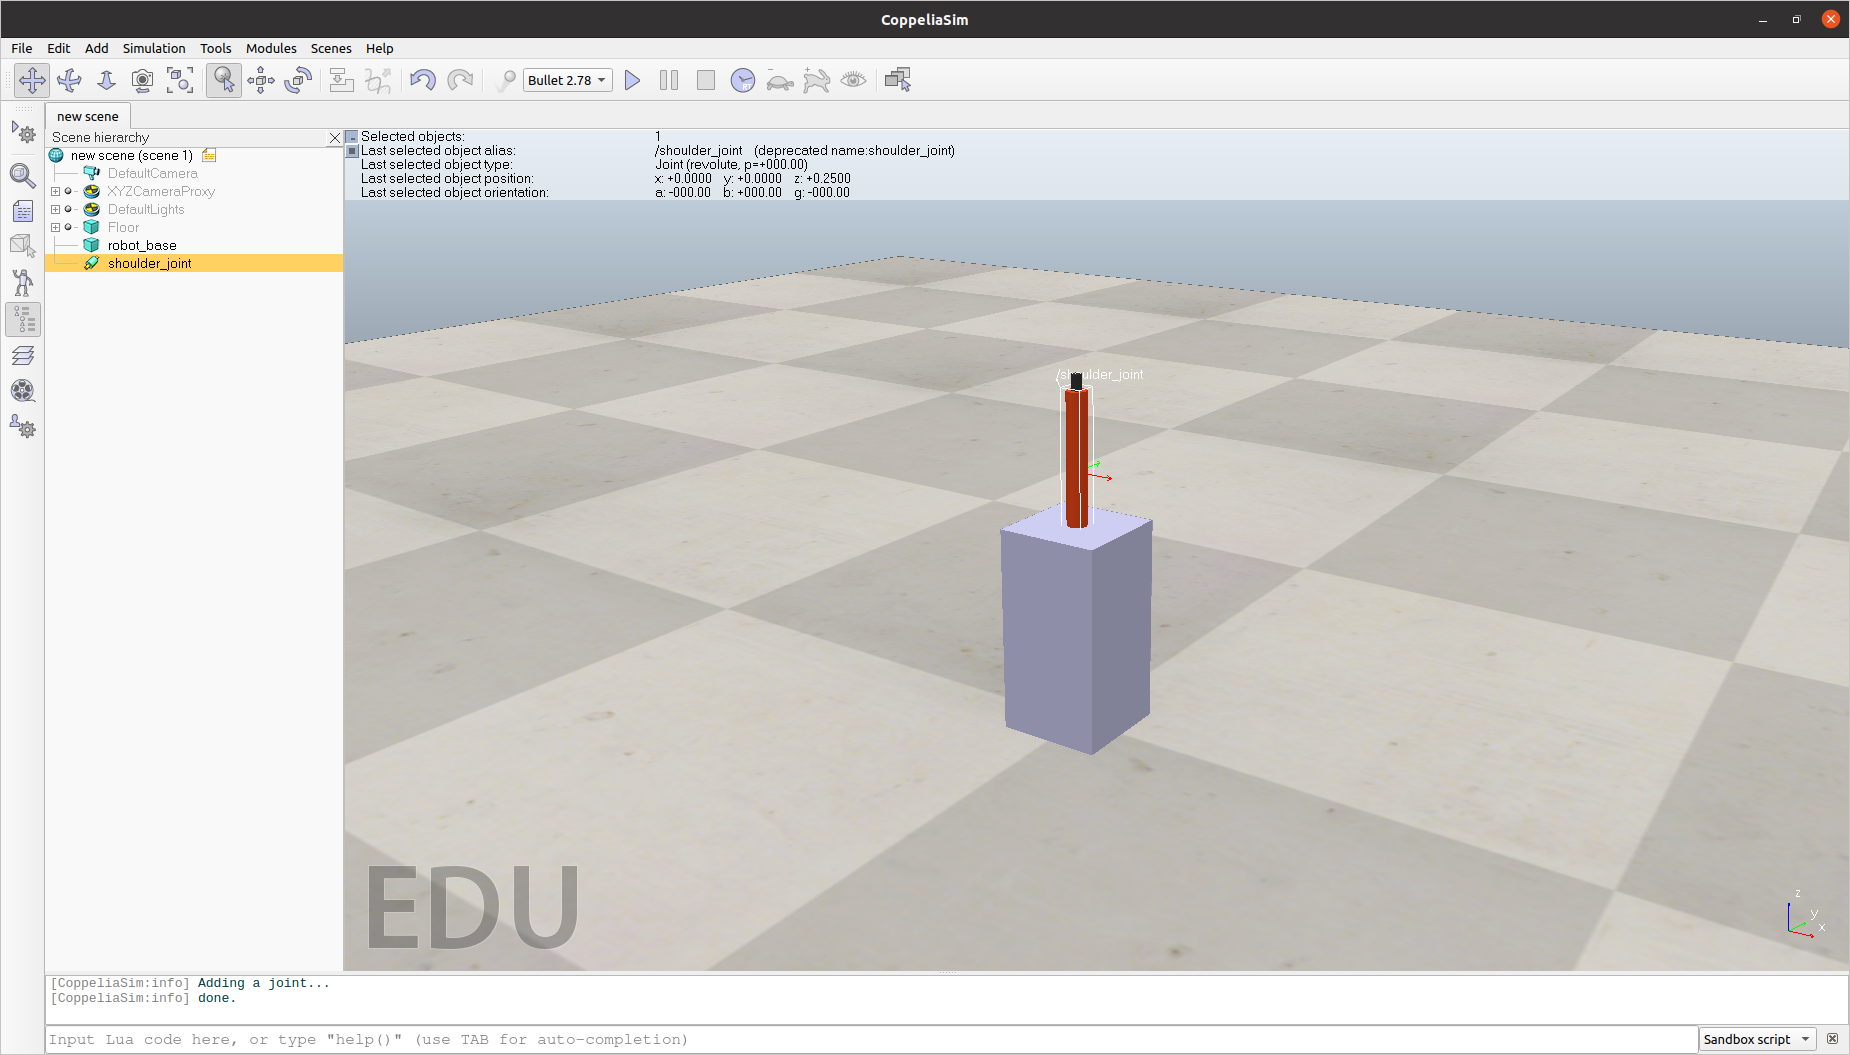
Relative to:option set toWorldand set value of Z to 0.25 so that the joint origin is slightly above the robot base -
The default axis of rotation for the revolute joint in coppelia sim is the z-axis, so we do not need to modify orientation since the axis of rotation we want is along z as well.
This should give you a result like this.
-
The next step is to add a link, select
Cylinderfrom thePrimitive Shapesand set value of x = 0.01 and z = 0.2. This will create a cylinder but you cannot see it at this point since it is inside the base. To place it properly , we need to apply some translations and rotations.- Select the cylinder from scene hierarchy
- Select the translation button and go to position tab like before
- Set y = 0.1 and z = 0.25
- Close the window and click on the rotation button

- Go to orientation tab, set `Aplha` = -90
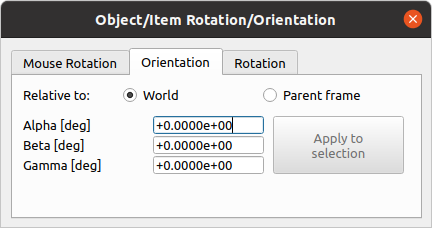
Now you should see the cylinder properly placed like this.
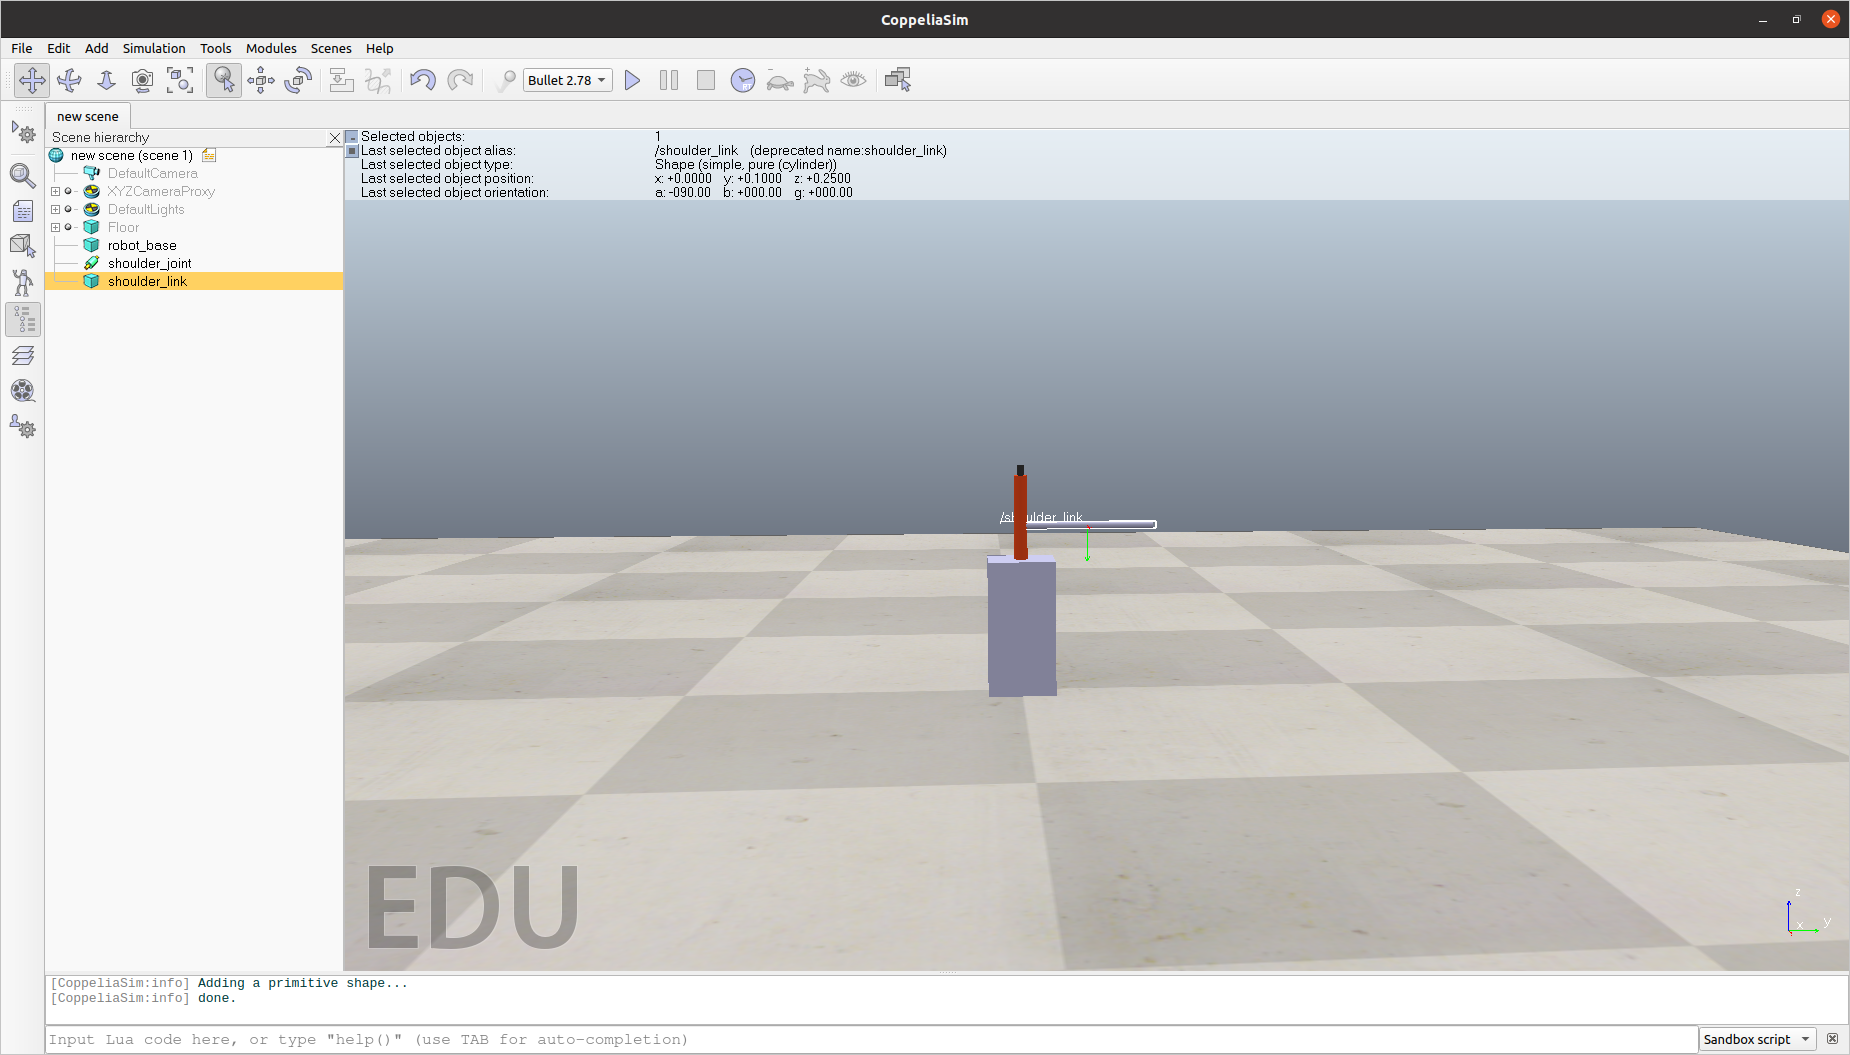
-
Now we have all the parts we need, but they exist as independent components and are not connected to each other. In this step we will create those connections that describe the structue of the robot.
- Select the
shoulder_jointfrom scene hierarchy , pressctrland selectrobot_base. - From Menu –> Edit –> Make last selected object parent
This makes
shoulder_jointattached torobot_base- Select
shoulder_link, pressctrland selectshoulder_joint - Select ‘Make last selected object parent’ from Edit
Now the
shoudler_linkis attached toshoulder_jointand you have an overall structure like this. - Select the

-
Once we have our structure, we need to tell the simulator how our
shoulder_jointbehaves.- Double click on the joint icon next to
shoudler_jointin the scene hierarchy to open the object properties window.
- Double click on the joint icon next to
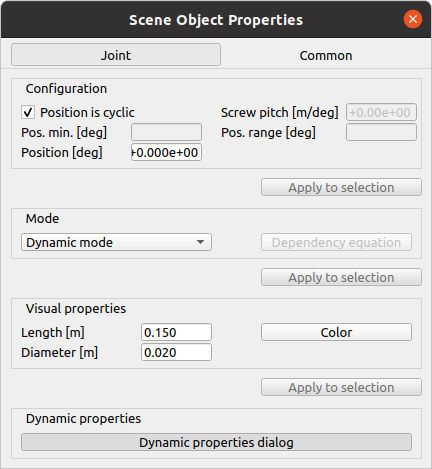
- Selct `Dynamic Properties Dialog` to open the joint dynamics properties.
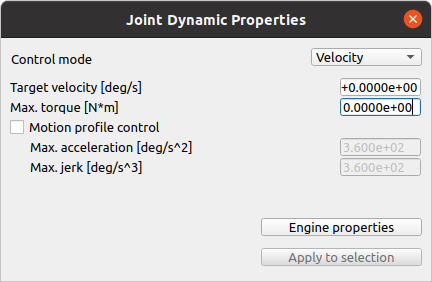
- Set `Control Mode` to velocity and set target velocity and torque to 0

- close the property windows.


The robot is now ready to be used.
Install ZeroMQ Remote API
We are going to use the ZeroMQ python remote API provided by CoppeliaSim.
- Set variable used by cmake to find CoppeliaSim
export COPPELIASIM_ROOT_DIR=/home/<user>/coppelia/CoppeliaSim - Follow instructions on https://github.com/CoppeliaRobotics/zmqRemoteApi to install the library.
Setup env to use the api from python
To keep things clean, we will create a python virtual environment to work in. If you dont have python3-venv installed yet, you should install it first.
-
create a venv named coppelia_env
$ python3 -m venv ~/copellia/coppelia_env -
Activate the env using
$ source ~/coppelia/coppelia_env/bin/activate -
Follow instructions on https://www.coppeliarobotics.com/helpFiles/en/zmqRemoteApiOverview.htm to install required python modules.
Controlling the robot using the remote API from python
API Reference : https://www.coppeliarobotics.com/helpFiles/en/apiFunctions.htm
import sys
import time
# Add the path to  zmq python client to system paths
sys.path.append("~/coppelia/zmqRemoteApi/clients/python")

from zmqRemoteApi import RemoteAPIClient

client = RemoteAPIClient()

# Enable client stepping so that we can manually step through the simulation
client.setStepping(True)

# Get the simulation object
sim = client.getObject('sim')

# From the simulation get the handle for the shoulder joint
shoulder = sim.getObject('/robot_base/shoulder_joint')

# Check the state of the joint
jointPosition = sim.getJointPosition(shoulder)
jointVelocity = sim.getJointVelocity(shoulder)

# Set desired joint velocity
targetVelocity = 2  # deg/s
maxForce = 0.1 # Nm
sim.setJointTargetVelocity(shoulder, targetVelocity)
sim.setJointMaxForce(shoulder, maxForce)

# Simulation loop
# We will simulate 50 steps

sim.startSimulation()

for _ in range(50):
    # Run one simulation step
    client.step()
    time.sleep(0.1)
    print(sim.getJointPosition(shoulder))

sim.stopSimulation()